

What are you searching for?
Installing Vectorworks Project Sharing Server
Last update:
25/6/2026
After downloading your Vectorworks Project Sharing Server installer, you are ready to install your additional design software. To do this, follow the instructions below:
- Extract the "Project Sharing Server Installer.zip" document:
- Windows: Right-click on the .zip file and choose ‘Extract’ in the context menu. Extracting is important, because opening directly from a .zip file can cause installation problems.
- macOS: Double-click the .zip file.
- Open the installer:
- Windows: Double-click the . exe file.
- macOS: Double-click the .pkg file.
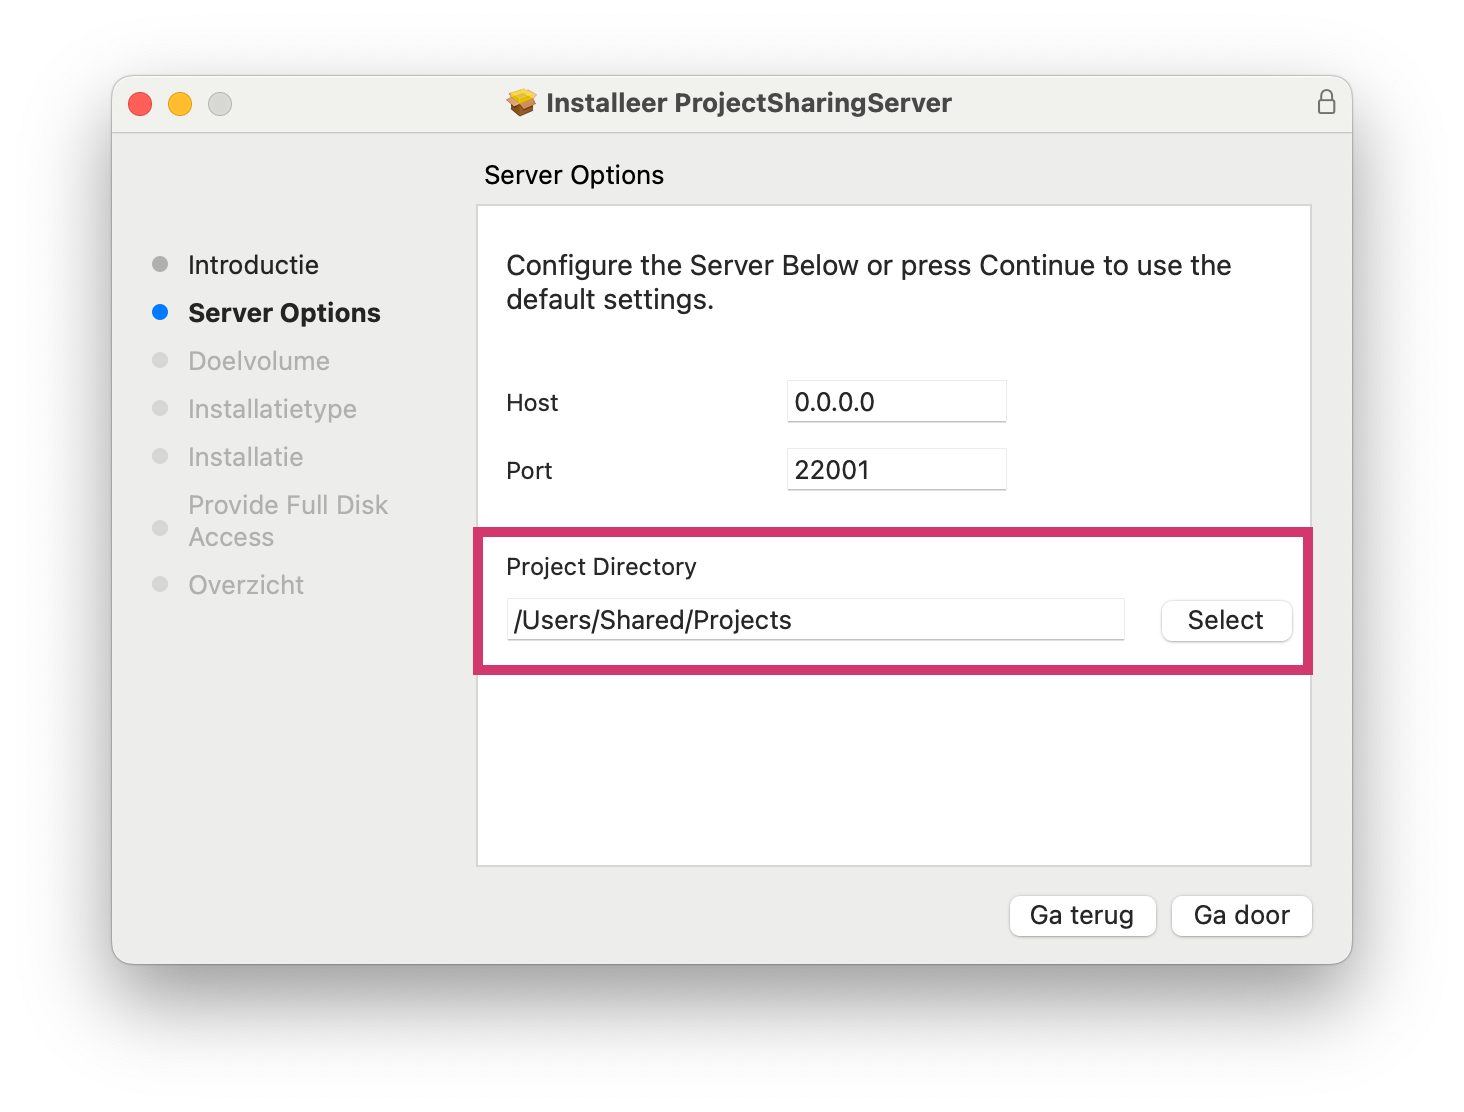
- A new "Install Project sharing server" dialog box will open. Go to the “Server options” tab.
- Under "Project Directory", choose the location where all project files from project sharing will be stored. By default, the installation will create a local "Projects” folder. Change the location if desired.
- For MacOS: Select "Continue"
- Select Install.
- The network server is now installed, quit the installer.
Set permissions on MacOS
When the network server is installed on MacOS 10.13 or later and the FileVault is activated, we recommend that you adjust some more settings to give the network server full access. These settings are only required on the server computer.
- Open the system settings and go to "Privacy and Security". Right click on "Full Disk Access".
- Click on the + icon on the bottom left. A new Finder window will open.
- Go to /usr/local/bin/
- Select the file “psserverd” and click “Open”
- Activate "psserverd"
The installation was successful when the folder "psserverd" can be found in:
- Windows: C:/ProgramData
- macOS: /Library/Application Support/psserverd/scripts/
Relevant articles
