Settings Presets
This article covers the Enscape Visual Settings options which are to be found located from within the Enscape viewport User Interface (UI) and more specifically how to create, save, and load Visual Settings Presets.
The Visual Settings dialog contains those settings to be used when tweaking and refining an image or video before export; settings such as Exposure, Field of View, Depth of Field, Ambient Brightness, and Resolution, for example, can then be saved as a Settings Preset and linked to a View, or a set of Views to allow better management of image export. Only the Visual Settings dialog has the ‘Presets‘ menu options that allow the creation and management of your Settings Presets.
There are two ways to manage your Visual Settings in Enscape. You can either save them to your computer’s hard drive as a .json file, or you may choose to store them in your CAD’s project file, the latter being the default operation.
With Enscape’s Settings Presets either the entire Settings Preset selected is read and it’s values allocated accordingly, or the ‘currently loaded preset’ is overwritten with any further calibrations you make to the settings, These changes are then automatically applied and adopted. Therefore, whichever preset is the ‘currently active’ Settings Preset, it will act as a value repository until the Save to file… option is used to create a new Settings Preset, or until an entirely new preset is created.
Accessing the Settings
To open the Visual Settings and the associated Settings Presets panel, the Enscape viewport must be running.
Once Enscape is open, you will want to click on the button highlighted at the right side of the Enscape UI, as shown in the following screenshot.

Once the Visual Settings dialog is open, click on the small chevron to the middle left of the dialog to expand / collapse the Settings Presets panel.
Create a Settings Preset
First click either of the Create Preset buttons that are available at the top and bottom of the Presets panel. Once a new Preset has been created, you can adjust the settings, which will be automatically applied and saved to that Settings Preset.
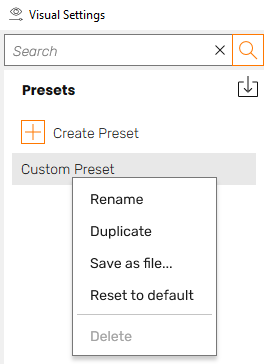
Preset Menu Options
By default, there is always one Settings Preset listed, by default it is named as Custom Preset. This can be renamed, if desired. Right click on any listed preset to reveal a menu containing five options:
- Rename
- Duplicate
- Save as file…
- Reset to default
- Delete (which is only available if more than one Settings Preset exists)
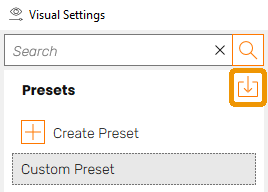
Load Preset Options
Hovering your mouse over symbol highlighted in the screenshot to the right, you can open or import previously saved Settings Presets, including Legacy Settings. Once you have clicked on the button, the Open dialog will appear, offering three import / open options.

Click the drop down menu at the bottom right of the Open dialog where three options are offered:
- Visual Settings Presets (*.json): all Settings Presets created after Enscape v2.6.
- Legacy Settings (*.xml): settings Presets created in versions of Enscape prior to v2.6.
- All Supported Formats (*.json;*.xml): which will load either of the above.
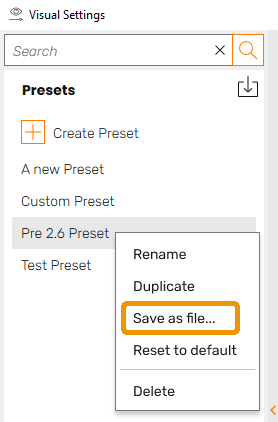
Saving Preset Options
All Settings Presets are saved to the CAD project file itself, so whenever you open the project the Settings Presets will be instantly available.If you want to use the Settings Presets in another CAD project, then you can save the Settings Presets out to a file via the Save as file… option. These files are always saved as *.json files and the Save As dialog allows you to choose the location to save to.

If you choose to overwrite an existing Settings Preset, then you will be prompted to confirm the overwrite.

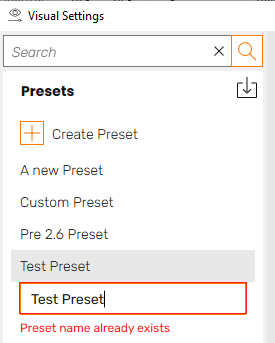
Manage Settings
You can Rename, Duplicate, or Delete a Settings Presets, as well as Reset to default, via the Presets Menu options.If you Duplicate a Setting, you will be prompted to rename it, or accept the default name which appends the copied Settings Preset name with the word ‘Copy’.Rename will also warn you if the name you want to use already exists.Reset to default will reset the preset back to the factory default settings.
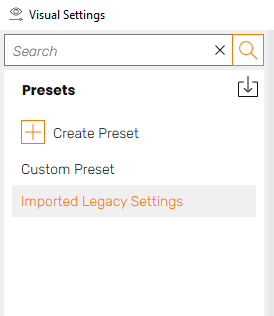
Import Legacy Settings
It is possible to import Legacy Settings Presets from versions of Enscape prior to version 2.6. As already mentioned above, this is done by clicking the Import button located within the Presets panel.Once imported, you should consider saving these settings out to a *.json file if you would like to use them in other projects.Otherwise, the settings will be saved to the CAD project.


